[This article is reproduced from WeChat WeChat official account’s "Xinhua Viewpoint" (ID: xhsxhsd)]
The "Carp Jumping at the Dragon Gate" water feature of the four-story fountain, and the rockery waterfalls built by the real mountains are cut off … This is not a star-rated hotel in a metropolis, but a newly-built middle school in Zhen ‘an County, Shangluo City, a deep poverty-stricken county in Shaanxi Province. And there are more doubts behind this "luxury middle school".
Generally speaking, schools that are beautiful or even gorgeous will not be questioned too much. After all, "no matter how poor you are, you can’t be poor in education". However, according to a survey conducted by Xinhua Viewpoint, the local fiscal revenue of Zhen ‘an County in 2019 was less than 200 million yuan, and the total investment of this middle school was as high as 710 million yuan, which led to high debts, which made people not only confused about whether it was an "image project" variant under the "luxury" appearance, but also suspected that some school leaders’ office buildings exceeded the standard.
"luxury" campus in poverty-stricken counties: it costs more than 2 million yuan to cut mountains and fake waterfalls, and the area of several leading offices is suspected to exceed the standard.
In order to solve the problem of insufficient degree in urban areas, since 2015, Zhen ‘an County has started to build a new Zhen ‘an middle school project. The new campus is located in Taiping village, Yongle street, Zhen’ an county, about 14 kilometers away from the county seat, and has been delivered recently. According to the school, the school covers an area of 272 mu, with a total construction area of 129,000 square meters, and plans to accommodate 6,000 students.
The reporter recently visited the site and found that there are 24 main buildings such as teaching building, dormitory building, dining building, gymnasium and teachers’ apartment in the new site of Zhen ‘an Middle School, and 120 classes are set up, which greatly improves the educational conditions in mountainous areas.
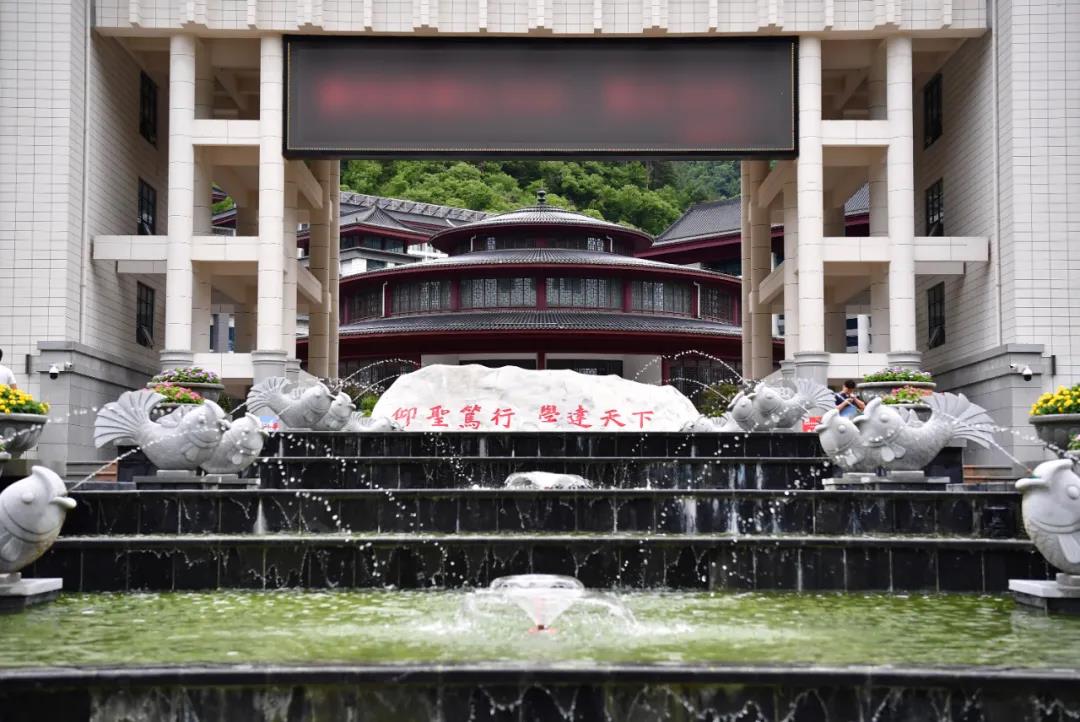
However, there are some facilities that have nothing to do with teaching in the campus: entering the campus from the magnificent antique archway gate, the four-story fountain waterscape ascending the steps along the trail, 16 stone carvings of carp distributed on both sides, and the school motto marble tablet about 8 meters long and 1.5 meters high on one side is located at the end of the fountain. According to the staff of the school, the waterscape means "carp jumping at the dragon gate", and the school motto stone tablet pulled from Xi ‘an cost 50,000 to 60,000 yuan.
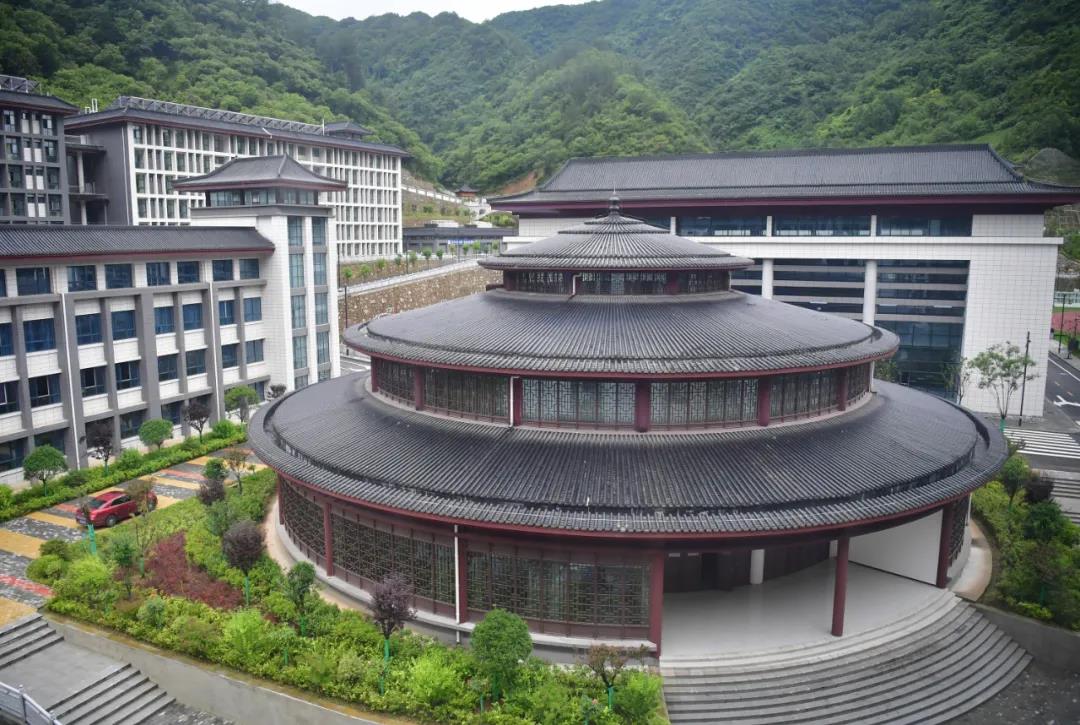
Passing through the huge square arch of the school administration building, the pyramidal roof with triple eaves and the library based on the Hall of Prayer for the Good Year in the Temple of Heaven are built on the high platform. There are some reading rooms in the building, but the space utilization rate is low. There is only one sand table in the large high school.
On campus, except for the stone railings that can be seen everywhere, every building has an imitation Tang-style building roof. In the southwest corner, a pavilion is built on a multi-level waterfall group with a length of about 50 meters and a drop of about 15 meters, surrounded by rockeries, waterwheels, plank roads, waterscapes and stone arch bridges.
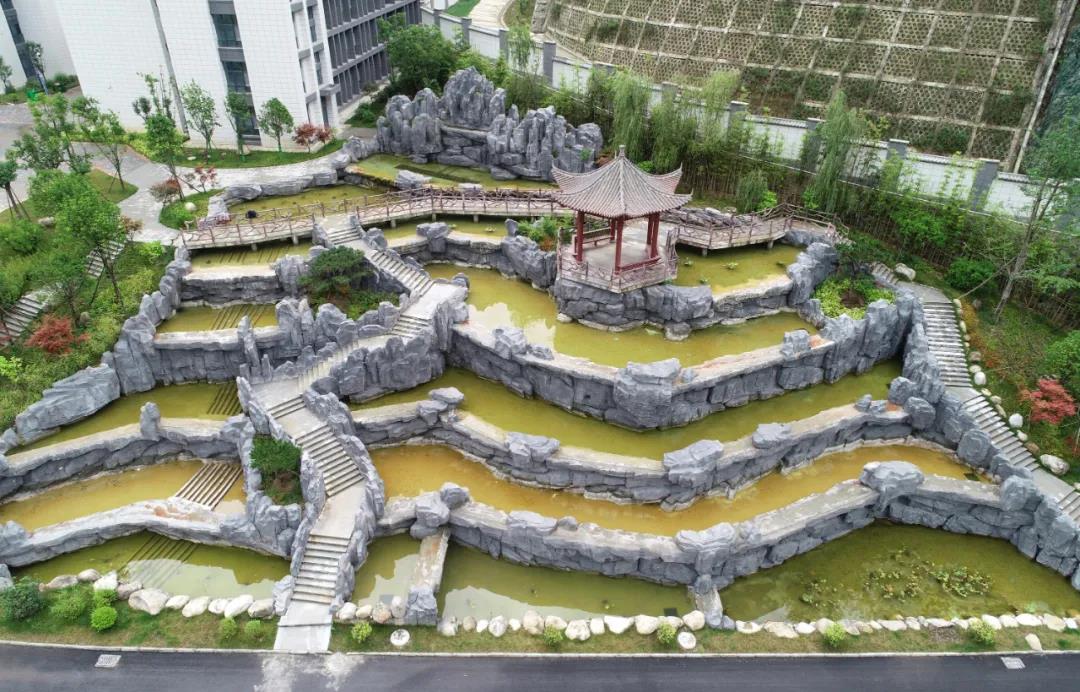
According to the relevant person in charge of the preparation office of Zhen ‘an Middle School, the water features of rockery waterfall cost more than 2 million yuan, and for this reason, some mountains were leveled and anti-landslide retaining walls were built. The affiliated projects of the whole school, such as green belt and pipe network, cost more than 80 million yuan.
The internal facilities of the administrative office building are also quite eye-catching. The visual area of the office with the number of "Deputy Secretary" is more than 30 square meters, and the visual area of another office with the sign of "Director of Class Management Office" is about 30 square meters.
According to the Construction Standard for Office Buildings of Party and Government Organs, the area of county-level deputy offices of county-level organs shall not exceed 24 square meters. As a deputy county-level unit, Zhen’ an Middle School has obviously exceeded the office area of "Deputy Secretary" and "Director of Class Management Office".
In addition, in the school dining room with a total area of 14,000 square meters, there are several private rooms on the fourth floor, with mahogany floors, chairs with flowers and exquisite tableware.
A cadre of Zhen ‘an County Party Committee said that the reason why the campus should be built with Tang-style architecture style is because the local government wants to build Tang Wenhua to "promote the integration of culture and tourism".
Last year, the local fiscal revenue was only 178 million yuan, and it was necessary to repay more than 50 million yuan in loans every year for 12 consecutive years.
As early as February 2013, the Ministry of Education issued the Notice on Building an Economical Campus through Diligence and Thrift Education, proposing that school buildings should be built according to the principles of simplicity, practicality, applicability and resource conservation, and the cost standards of school building construction projects should be strictly controlled, and luxury decoration should not be allowed, and "luxury school gates" and "luxury office buildings (rooms)" should be resolutely put an end to.
The Opinions on Further Adjusting and Optimizing the Structure to Improve the Efficiency in the Use of Education Funds issued by the General Office of the State Council in August 2018 clearly states that education should be carried out with diligence and thrift, image projects and achievements projects are strictly prohibited, and luxury schools are strictly prohibited from being built beyond the standard. Every education fund should be used in key places. We should do our best, do what we can, and not engage in the project of "living beyond our means".
According to the reporter’s investigation, the total investment of Zhen ‘an Middle School Project is 710 million yuan, and Zhen ‘an County needs to repay at least 50 million yuan in loans every year for 12 consecutive years.
According to the relevant person in charge of the school preparation office, the Zhen ‘an Middle School project started in 2015, and the preliminary expenses such as land demolition, three links and one leveling, planning and design cost 90.8 million yuan. Subsequently, Zhen ‘an State Investment Corporation and the contractor jointly invested more than 100 million yuan to set up a project management company, and raised 320 million yuan from the bank, making up 510 million yuan of the total investment in the project budget.
"In the past few years, the final settlement cost has changed again, and the current investment has reached 710 million yuan." The person in charge said that in addition to the estimated annual repayment of 53.37 million yuan to the bank for 12 consecutive years, there are still about 200 million yuan in arrears. "In the future, the county will take part of the money, and then find ways to win the higher-level funds to solve part of it."
As a deep poverty-stricken county that took off its hat in May 2019, in 2019, Zhen ‘an County completed local fiscal revenue of 178 million yuan, and public budget expenditure mainly relied on fiscal transfer payment. Zhen ‘an County’s "Report on the Implementation of the Budget in 2019 and the Draft Budget in 2020" shows that in 2019, "the task of preventing and resolving government debt risks is arduous, and the debt repayment pressure is increasing". From January to May 2020, the county’s local tax revenue reached 60.81 million yuan, down 7.2% from the same period of last year. According to the report, in 2020, "the government debt service will surge, and the contradiction between revenue and expenditure will become more acute".
Beware of the spread of luxury and livelihood projects
In the interview, some local cadres believed that building schools with high standards reflected the concept of "no matter how poor you are, you can’t be poor in education", even if you build them ahead of time, it is understandable. However, some experts say that it sounds like a good thing to borrow money to run a school, but in fact, a lot of funds are not really used to improve teaching, which leads to a waste of funds, formalism and a distorted view of political achievements.
Some teachers in Zhen ‘an Middle School reported that while the hardware was improved, the software such as school teachers’ strength was not significantly improved. Moreover, some planning is unreasonable, resulting in a waste of resources.
According to the data of the school, there are four teacher apartment buildings in the school, of which 104 are two bedrooms, one living room, one kitchen and one bathroom, and 334 are one bedroom and one bathroom. All the apartments are "Simmons, wardrobes, bookcases, sofas, tables and chairs, dining tables, stoves, sanitary baths and TV broadband, and you can check in directly with your bag".
However, many teachers report that most teachers live in the county town and will not move in, which may cause apartment buildings to be idle. Moreover, the new school is 14 kilometers away from the county seat, and the monthly commuting expenses will be more than 1,000 yuan, which increases the burden on teachers.
Shi Ying, vice president of the Chinese Society of Social Sciences and head of the People’s Livelihood Group of the Shaanxi Provincial Decision-making Advisory Committee, said that it is understandable that the school is ahead of schedule, but the school is not a scenic spot, so it is unnecessary to build antique buildings and rockery waterfalls beyond its actual value.
Some experts said that the original intention of attaching importance to education in poor areas is worthy of recognition, but we must do what we can. Especially after the wind stops in the building, it is necessary to prevent the wind of luxury from spreading to people’s livelihood projects. While improving the educational hardware, the government should also invest in the construction of teaching staff and personnel training.